Vintage
Car Work

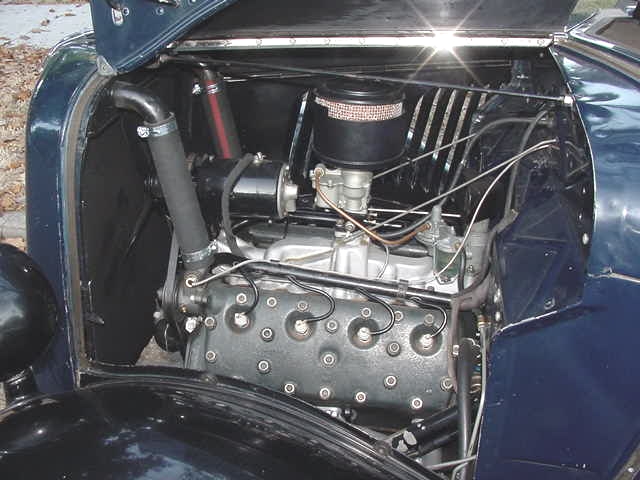
1930
Pierce Arrow
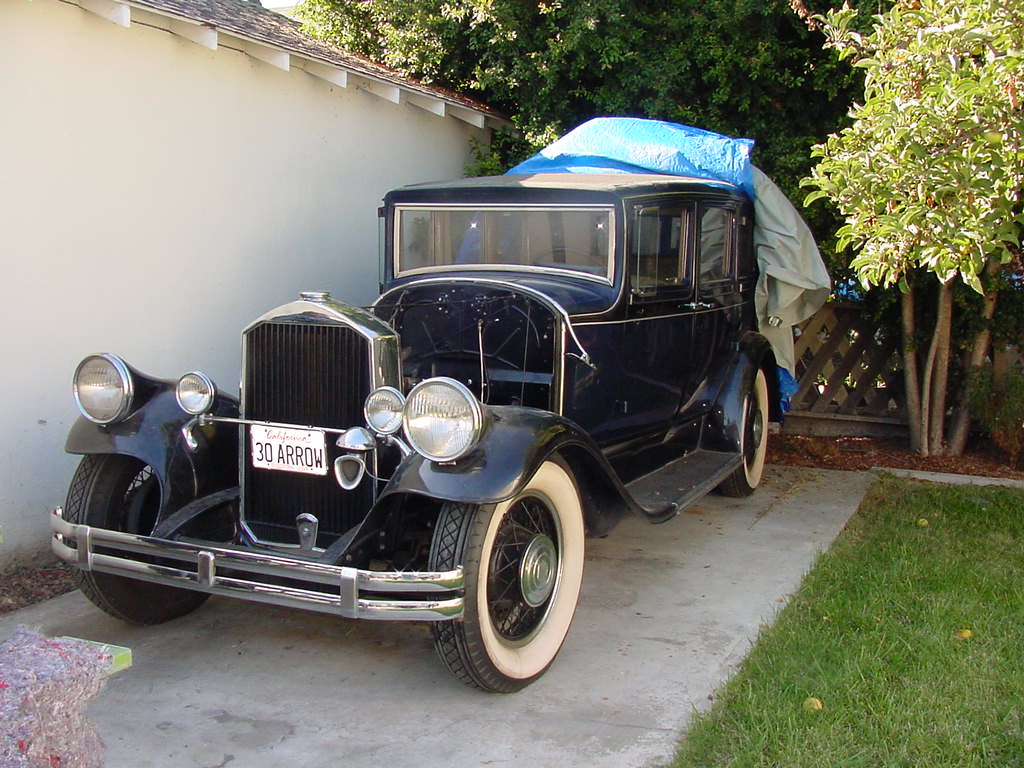
Bill found this car in San Jose about ten years ago or more. We had it
delivered to his home then did some initial service work to
get it
running better. Because of interests and calls in other areas of Bill's
life his Pierce Arrow went back into storage for several years. Bill
kept learning about his car and buying parts on eBay (a lot of parts)
until his time
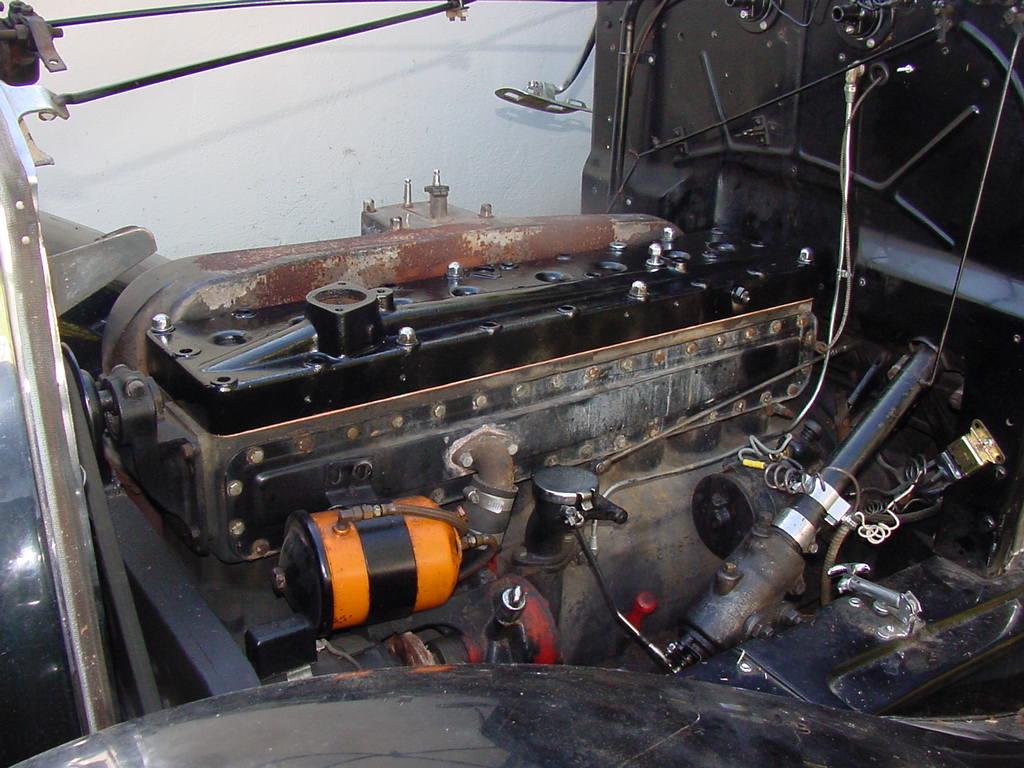
demands allowed us to pick up where we left off. The engine had a blown
head gasket and Bill worried about the stock oil pump exploding (made
from pot metal and a known weak link) so I had him obtain a replacement
brass pump and made a new pump drive. We changed the head gasket and I
surfaced his head. I thought there was something wrong with the gasket
fit which turned out to be a mismatch between engine and head series.
We've put it back together while he looks for a correct head (a correct
spare came
with the car, but it's in very poor shape from a prior crack repair). I
also gave the engine a minor tune up. Bill changed his fuel tank and
lines, ignition coils and tires. I redid his steering and clutch
adjustments. There is always a part of Bill's character that wants to
Hot Rod anything he owns. Somewhere along the way he found a two BBL
manifold and then bought a bunch of updraft "U" and "UU" series
carburetors so I could to try and assemble a working combination. I
cannibalized a half dozen carburetors to perhaps build one serviceable
unit. It is heart breaking and expensive to have to winnow through
boxes of junk to find a couple of decent parts but that is the vintage
car restoration process sometimes.
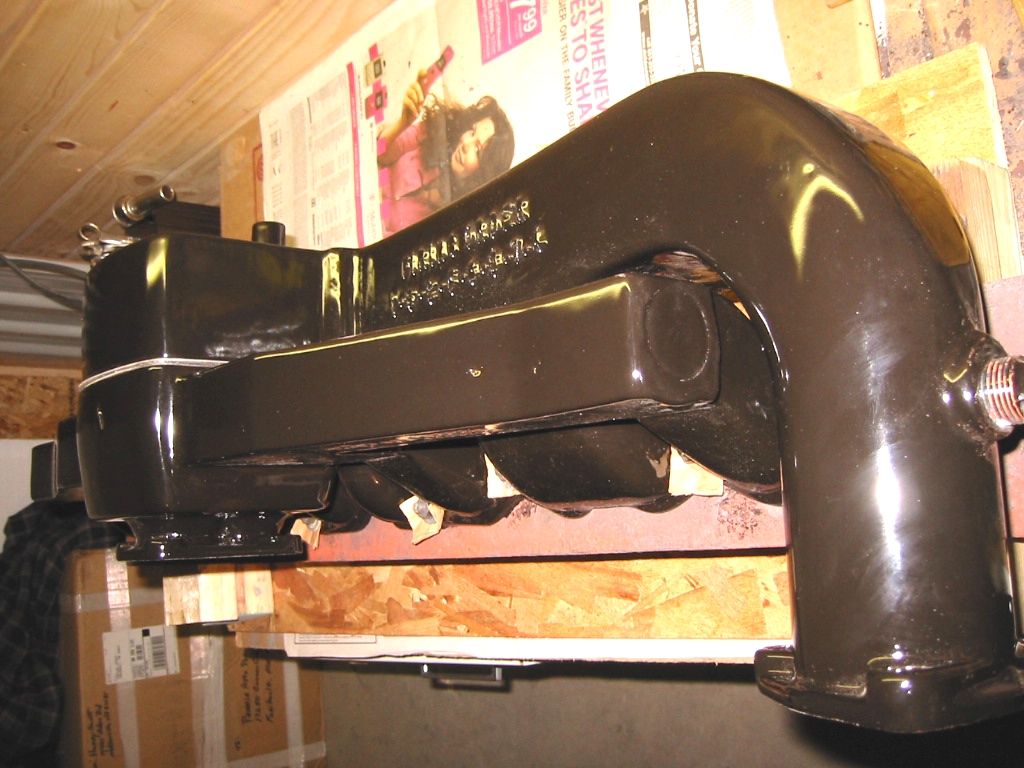
The 2 BB manifold was
in poor condition; having cracked
porcelain and significant warp, a frozen heat riser and
excessive corrosion.
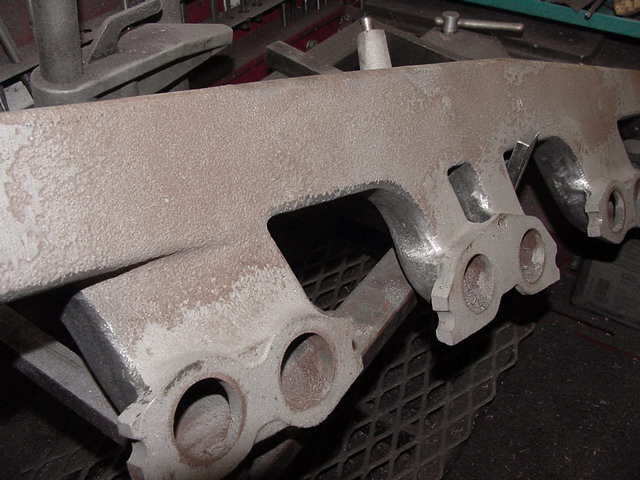
 To restore the manifold I
sandblasted it,
then used porting and
polishing techniques on the exterior surfaces to prepared it for being
re-coated with new porcelain. Old cast iron is very brittle. With this
two piece manifold (separate intake and exhaust castings) alignment
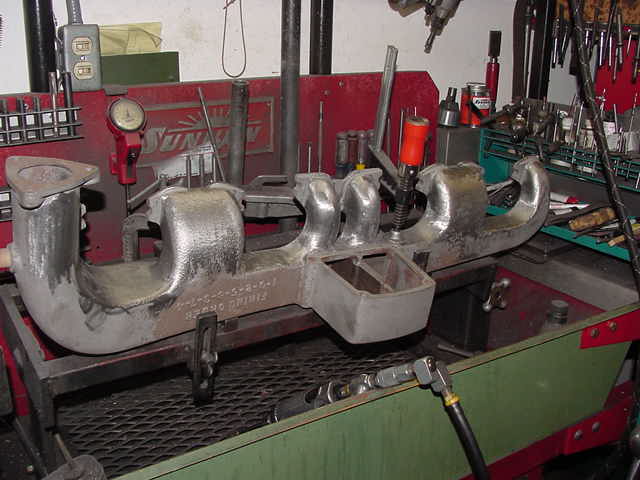
when machine work is done becomes critical. Several cracks appeared
during the restoration process so I determined to stress relieve both
castings and straighten them as a unit, and weld repair the exhaust at
the same time. Then I'd re-evaluate machining. I fabricated a
very heavy (about 65 lbs) restraint bar with steel dowels to simulate
mounting alignment locations. Then I added bolts to restrain manifold
movement in "wrong" directions while allowing movement toward being
flat and correctly aligned. I delivered the whole manifold and fixture
to Gary and Guy Reed at Lock-N-Stitch
in Turlock, CA. for preheating, welding, and post heating at their
facility. They did a great job so I finished porting inside, made a new
heat riser shaft bushing, a new gasket pack for the plenum, and did a
final fit of the manifold sections. I then machined both manifold faces
in one set up. I'd contacted
Tom Sparrow at Prairie Auto Porcelain (17250 Cannon City Blvd.
Faribault, MN. 55021. Tom's cell is 507-581-9887) about re-firing
Bill's parts so they were ready to finish the
job. I shipped the entire manifold and assembled restraint bar to use
as the manifolds were porcelain fired. It came back looking wonderful
and straight as an Arrow. We also thermal barrier coated inside the
manifold surfaces to prevent heat from entering the old iron. This job
was really expensive but Bill feels it is a rare part, so justified.
To restore the manifold I
sandblasted it,
then used porting and
polishing techniques on the exterior surfaces to prepared it for being
re-coated with new porcelain. Old cast iron is very brittle. With this
two piece manifold (separate intake and exhaust castings) alignment
when machine work is done becomes critical. Several cracks appeared
during the restoration process so I determined to stress relieve both
castings and straighten them as a unit, and weld repair the exhaust at
the same time. Then I'd re-evaluate machining. I fabricated a
very heavy (about 65 lbs) restraint bar with steel dowels to simulate
mounting alignment locations. Then I added bolts to restrain manifold
movement in "wrong" directions while allowing movement toward being
flat and correctly aligned. I delivered the whole manifold and fixture
to Gary and Guy Reed at Lock-N-Stitch
in Turlock, CA. for preheating, welding, and post heating at their
facility. They did a great job so I finished porting inside, made a new
heat riser shaft bushing, a new gasket pack for the plenum, and did a
final fit of the manifold sections. I then machined both manifold faces
in one set up. I'd contacted
Tom Sparrow at Prairie Auto Porcelain (17250 Cannon City Blvd.
Faribault, MN. 55021. Tom's cell is 507-581-9887) about re-firing
Bill's parts so they were ready to finish the
job. I shipped the entire manifold and assembled restraint bar to use
as the manifolds were porcelain fired. It came back looking wonderful
and straight as an Arrow. We also thermal barrier coated inside the
manifold surfaces to prevent heat from entering the old iron. This job
was really expensive but Bill feels it is a rare part, so justified.
 .
.
Bill has moved out of
the area and made arrangements to
disassemble his whole car at his son's shop to repair interior damage
and prepare it for club and show uses. This manifold will be stored
until used in it's final assembly.
Tom
is a collector who likes to drive and
use his vehicles. He has various automotive interests but likes 1930's
to 60's vehicles. This Cadillac reflects restoration work in other
shops before it came into Tom's garage. Tom wanted to freshen

the car's looks and correct minor deficiencys so it would be fully
functional for daily use. He has an interior man, and a paint man, but
needed me to do a gig list of about twenty mechanical and electric
items.
The car became registered for the Palo Alto Concors 'de Elegance and
then was selected to be the "cover car" on the show programs. Cadillac
was the featured mark that year so suddenly some pressure was on to
make this car as nice as it could be without redoing anything in a
major way. I was tied up on other projects and nearly didn't do my part
in time. As it turned out I did my mechanical and electrical repairs
after final detailing was complete. That was nerve wracking because I
had to work under the dash, undercarriage, and hood without soiling or
disturbing anything I couldn't re-clean or re-adjust.
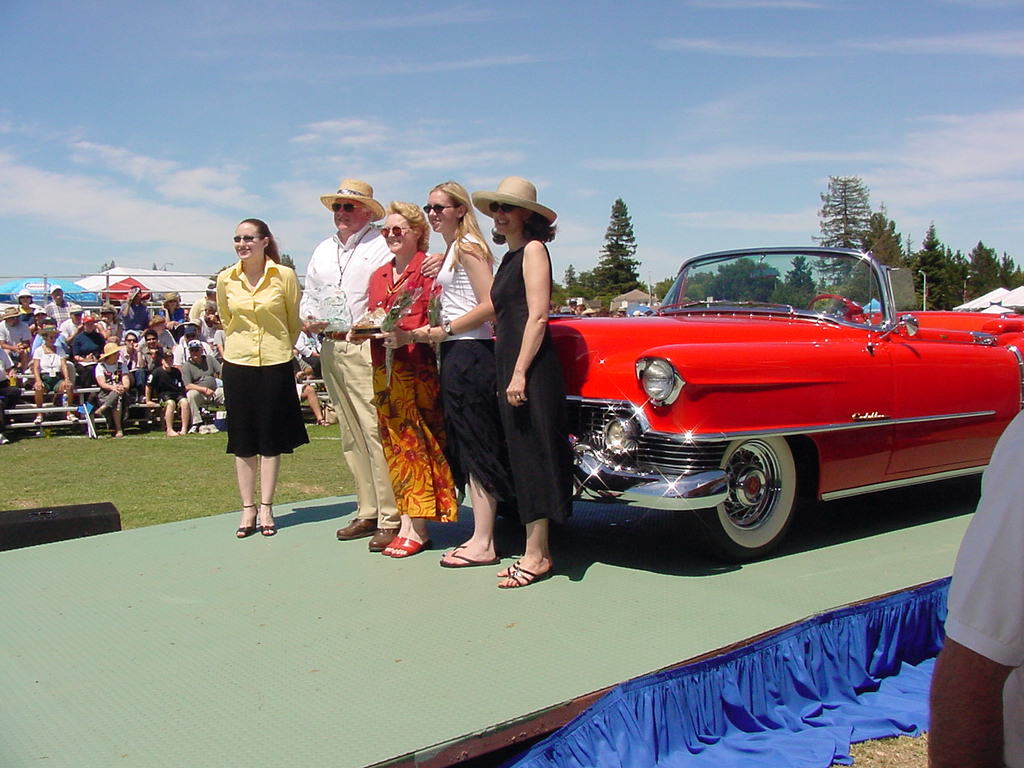
I finished the day before the show and had an evening to drive around
and enjoy this wonderful piece of automotive history. Tom invited me to
the show to be available for any last minute issues and see the judging
committee work. I had an unlimited pass so this photo was taken from
behind the awards ramp looking out of the patrons tent. Tom received
the Manufacturers Award Trophy and Best in Class Trophy with his car
that year. He kept it for awhile and I did some service work on it
before it was sent on location for a movie shoot. One of the movie crew
fell in love with it and after buying it from Tom exported it to
Belgium. We hear it is quite popular over there too.
Leo's
1935 Ford 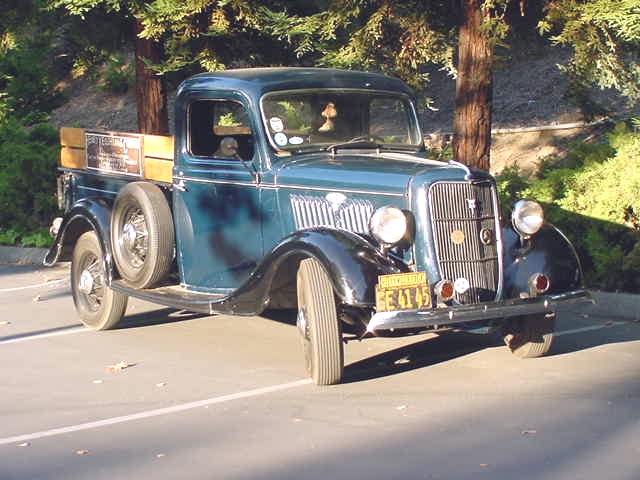
Leo is a really nice fellow.
He's quiet, knowledgeable, has a great
sense of humor, and loves restoring old farm equipment, pre-war
aluminum trailers, and Bugatti's. He drives and uses nearly everything
he works on so when he wore this pickup truck out it was no surprise to
the friends who know him. Nor was it surprising when several of them
helped Leo take his truck apart for restoration and "up
dating".
They are a great bunch of guys having a good time in their retirement
years. Soon a great used engine was located and checked out and set
into place. The chassis was worked over and some accessories, lights,
horns, and an electric fuel pump were bolted into place. Then Leo
called me and requested time in my shop so I could convert it to a 12
volt, negative ground system..... It turned into a rather complete
re-plumb, re-wire, vehicle assembly project because almost all prior
assembly work which had been done was more on a "trial fit" basis
rather than "finished". Some items of special note are an override
circuit to engage the fuel pump to prime the engine after prolonged
parking and a shut down circuit if the oil pressure fails. His truck
has thermal barrier coated headers and thermal insulation on the cab
floor. Leo wanted a sound deadened cab so acoustic matting went into
the headliner, rear cab, and under dash area. We wanted a "clean"
firewall look so many components that had gathered there were relocated
under the dashboard. His flat head is
 mildly
warmed up with dual exhaust pipes, an aluminum manifold and careful
selection of internal parts. I added an external oil filter remotely
mounted under the left hand fender behind a custom rock guard / splash
shield.
The truck still has mechanical brakes and an original transmission,
drive shaft, and rear axle. Leo tows a small trailer to various meets
and shows all over the state and nearby out of state
locations.
mildly
warmed up with dual exhaust pipes, an aluminum manifold and careful
selection of internal parts. I added an external oil filter remotely
mounted under the left hand fender behind a custom rock guard / splash
shield.
The truck still has mechanical brakes and an original transmission,
drive shaft, and rear axle. Leo tows a small trailer to various meets
and shows all over the state and nearby out of state
locations. 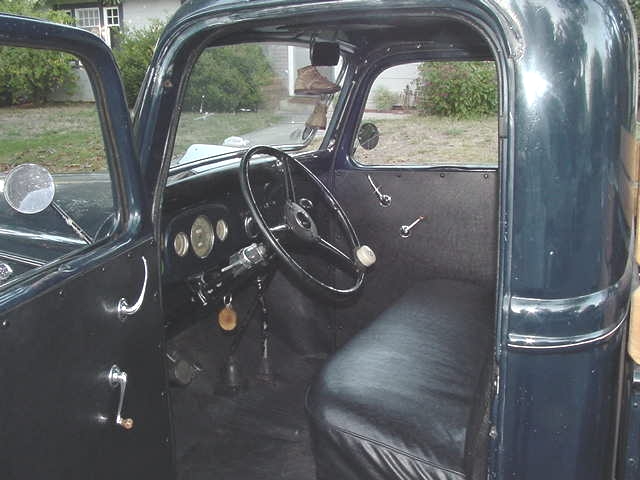
His daily use of the truck
makes cosmetic issues secondary to
functional ones. It makes quality repairs, adequate vehicle inspection,
and complete service mandatory. Just like in the old days.
Race
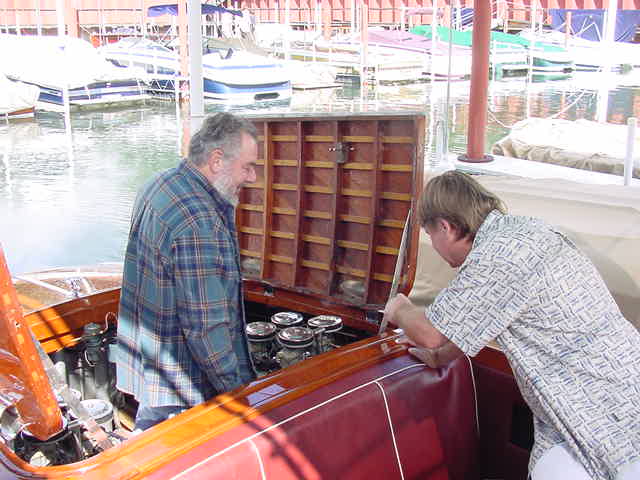
boat "Miss Comet" 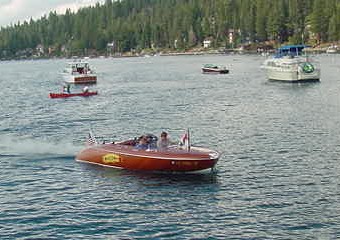
This is another one of Tom's interests, old wooden boats. He has
several and this one was rescued from the fate of disuse and decades of
prolonged storage. His family and craftsmen from Sierra Boat Works,
Lake Tahoe, CA. worked many, many hours to refinish the hull and
restore original fittings. The history of the boat as a racing design
with unusual center steering and dual aircraft throttles is
distinctive. After restoration the boat was entered in the annual
competition at Lake Tahoe and took first place. However it had several
functional issues. The 6 volt electrical system had been retained and
after winning the Tahoe show Miss Comet was again unexpectedly stored a
couple of years. Tom wanted to start using the boat again for the
summer of 2004 so I was asked to get her running, figure out why the
electrical system kept failing, and service the engines for a seasons
trouble free boating. Miss Comet has twin vintage Chrysler
Hemi
engines and differential throttle steering for low speed maneuvering.
Then the throttles are locked when the center rudder becomes effective
at high speed. Cooling water is pulled from the lake. Wet sump oiling
and wet manifolds
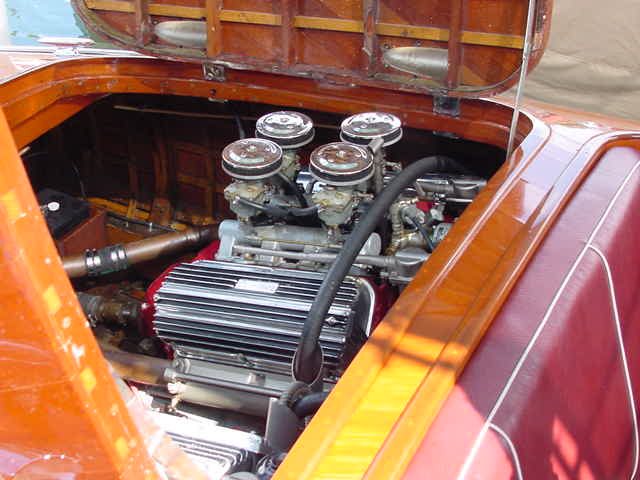 are
typical marine equipment. Because the men who rebuilt the engines and
installed them in the hull died just after completing their work
details like water and fuel drains, electrical circuits, fuel
management provisions and procedures for dry dock testing all had to be
figured out by inspection. It turned out the boats fuel pumps had an in
line restriction in one pump and a suction side air leak in the other.
The batterys were of insufficient ampere hour capacity to start a
warmed up Chrysler and the generators were geared too slow to recharge
them. That had lead to the regulators being miss adjusted. A small
water pump leak that kept the keel area wet had deteriorated two
electrical disconnect switches hidden under the hull ribbing spars. It
was quite an adventure to figure out which problem was the pivotal
problem preventing the boats operation.
are
typical marine equipment. Because the men who rebuilt the engines and
installed them in the hull died just after completing their work
details like water and fuel drains, electrical circuits, fuel
management provisions and procedures for dry dock testing all had to be
figured out by inspection. It turned out the boats fuel pumps had an in
line restriction in one pump and a suction side air leak in the other.
The batterys were of insufficient ampere hour capacity to start a
warmed up Chrysler and the generators were geared too slow to recharge
them. That had lead to the regulators being miss adjusted. A small
water pump leak that kept the keel area wet had deteriorated two
electrical disconnect switches hidden under the hull ribbing spars. It
was quite an adventure to figure out which problem was the pivotal
problem preventing the boats operation.
Gary Hubback and I worked out a cooling system modification so we could
fire the engines while the boat was trailered. We wouldn't run the
props or transmissions because Miss Comet's hull changes
shape if
not wet and floating causing prop shaft angles to exceed design limits.
My son Daryl and I figured out the fuel system and finally fired the
engines. Then trouble shooting the generators and batterys was pretty
easy. I fabricated period correct battery boxes for industrial sized
batterys and fixed the various switches and connectors. I replaced a
few things here and there while waiting for new generator pulleys.
Eventually the boat was ready to re-float and go on shake down runs. We
made a long weekend trip to perform those adjustments and took the
first photo in this set while leaving the harbor area of Serra Boat
works. Unfortunately a bad transmission kept us from approaching the
boats top speed. I hear it's a hair under 100 mph. A few months later
the transmission was fixed but the season was over by then so Miss
Comet went back into storage. She was sold in 2006 to an Eastern buyer.
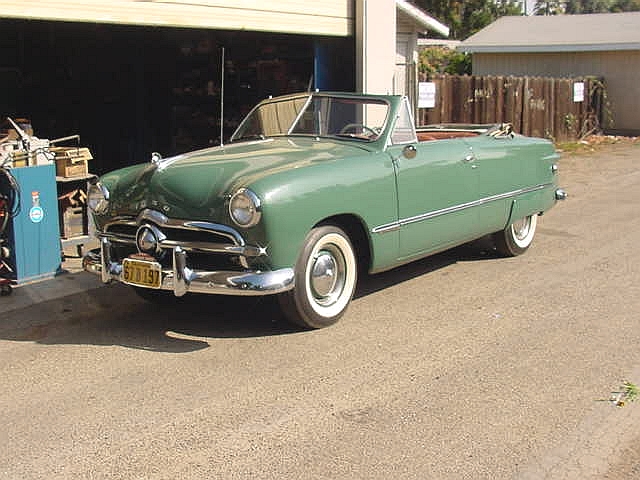
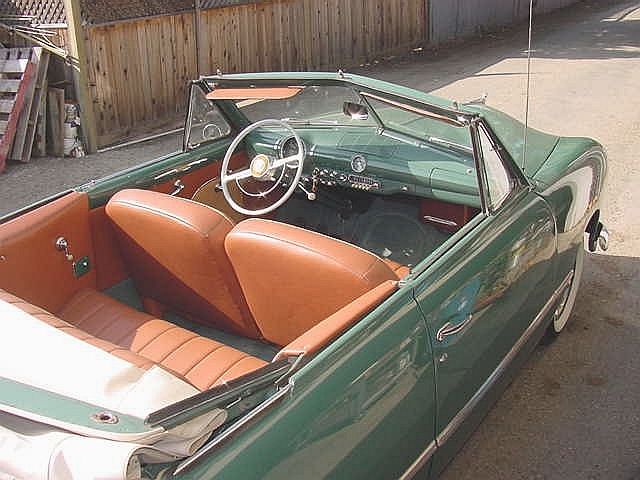
1949 Ford Convertible. Tom
knew of this car for a number of years before acquiring it from the
east coast. It was restored back there and came here with a fairly
short completion item list. It is a V-8, radio, heater, manual
transmission convertible that has remained very stock. Gary Hubback
serviced the brakes and suspension at his shop. After that
 Tom
asked me to repair the drive shaft, replace the transmission, and
rebuild some items under the hood. I detailed the Flat head
engine and re-plated a few brackets and throttle linkage parts.
Overhauling Tom's convertible top pump was a bit more challenging but
turned out well. I also rebuilt the shift linkage, installed a few
missing bolts, and stamped a new ID plate for his firewall. I repaired
his trunk lock / handle / latch assembly while keeping the original
key. I mixed up a bottle of touch up paint for future use in case door
nicks occur. It was a fairly typical potpourri list for a newly
acquired vehicle.
Tom
asked me to repair the drive shaft, replace the transmission, and
rebuild some items under the hood. I detailed the Flat head
engine and re-plated a few brackets and throttle linkage parts.
Overhauling Tom's convertible top pump was a bit more challenging but
turned out well. I also rebuilt the shift linkage, installed a few
missing bolts, and stamped a new ID plate for his firewall. I repaired
his trunk lock / handle / latch assembly while keeping the original
key. I mixed up a bottle of touch up paint for future use in case door
nicks occur. It was a fairly typical potpourri list for a newly
acquired vehicle.
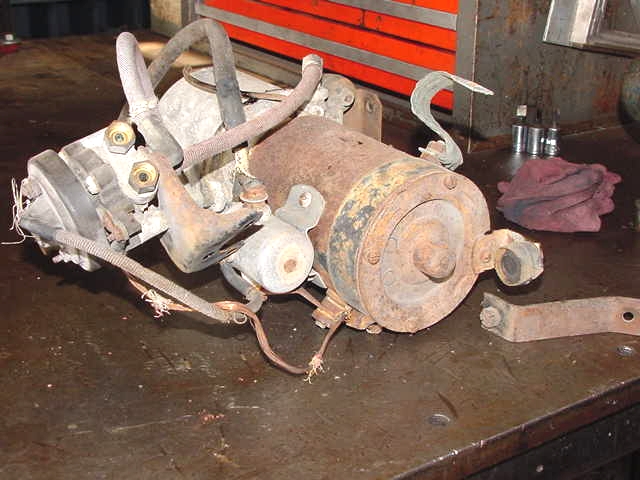
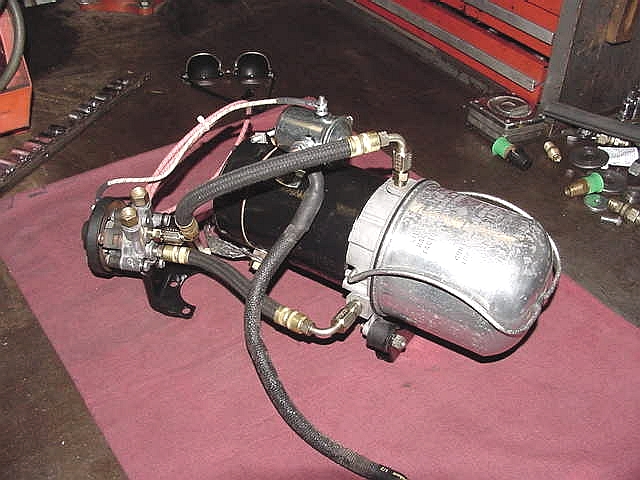
These are photos of the convertible top pump before and after
rebuilding. Quite a few small parts were located at HYDRO-E-LECTRIC in
Florida and installed here. We were lucky that the switch assembly
cleaned up as they are quite rare. Royal Brass in San Jose, CA. made
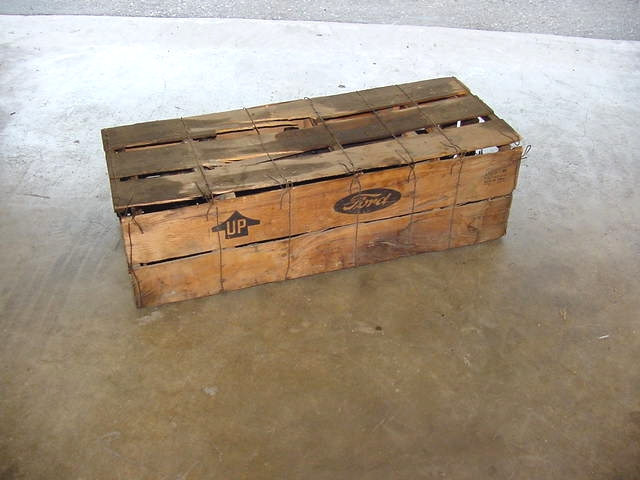
new hoses with fittings similar to OEM . An N.O.S. transmission
assembly was found at All Ford in Campbell, CA. still in the original
crate.
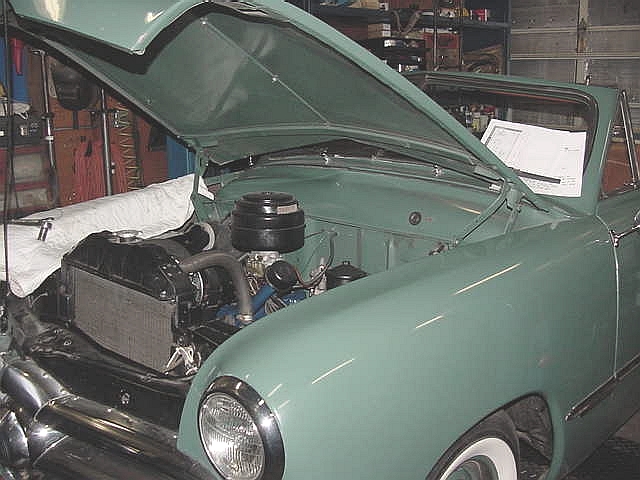
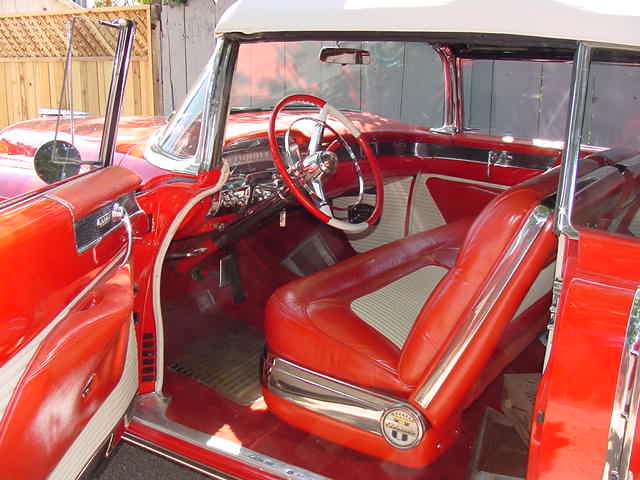
This shoe box Ford's under hood area looks just as nice as the vehicles
exterior. Somebody had already started with late model Ford "blue"
paint on the engine so we stuck with it. The blank area on the left
firewall is where Tom's top pump mounts. It is a fully rebuilt pump,
but non-functional in this installation because of the risk brake fluid
might leak and ruin adjacent paint work. A new style after market pump
has been mounted in the truck to actually operate both convertible top
hydraulic cylinders. I've driven this car quite a bit. It has very
comfortable seating, easy steering, and adequate power. It is easy to
understand why it was such a sought after car when Ford started
production of them after WWII.
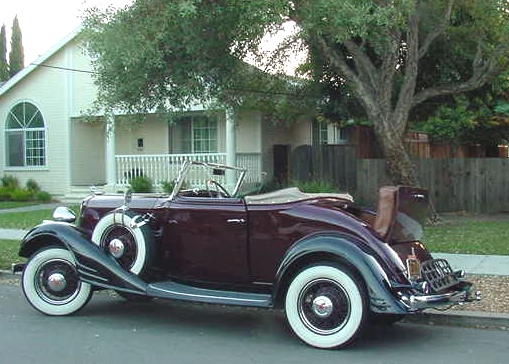
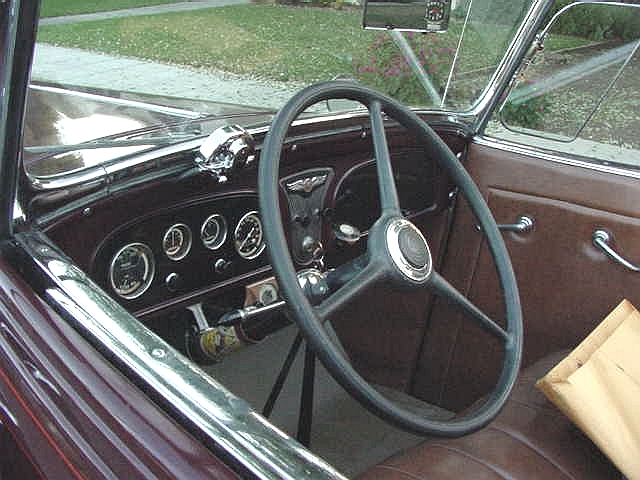
1932 Pontiac Convertible.
This is the last of Tom's cars I'm going to post. It's a
Pontiac
he keeps just for fun and he drives it on sunny days to work or on
errands. I've done some regular maintenance, a few repairs, and
modified a couple of items for him. An interesting item is the windup
clock in the rear view mirror.
I reproduced the Indian Head nickel shifter ball for this car and added
the side glass wind deflectors for Tom. This car is equipped with an
original drive train, radio, heater, and "touring" items like wipers
and turn signals. The rumble seat frame had been upholstered upside
down and latch assembled incorrectly. That was hard to figure
out, but when done right allowed my son to install a girl friend in the
rumble seat. This is a pleasantly intimate car when the top is up. It
is a car in which one can sit well and drive very easily.
Radiator Cap Hood
Ornaments. These hood ornaments represent about four years of
collecting parts and pieces by the owner from various auctions, club
functions and museum sales. My task was to fabricate functional
radiator caps from his parts then mount ornaments to the caps. 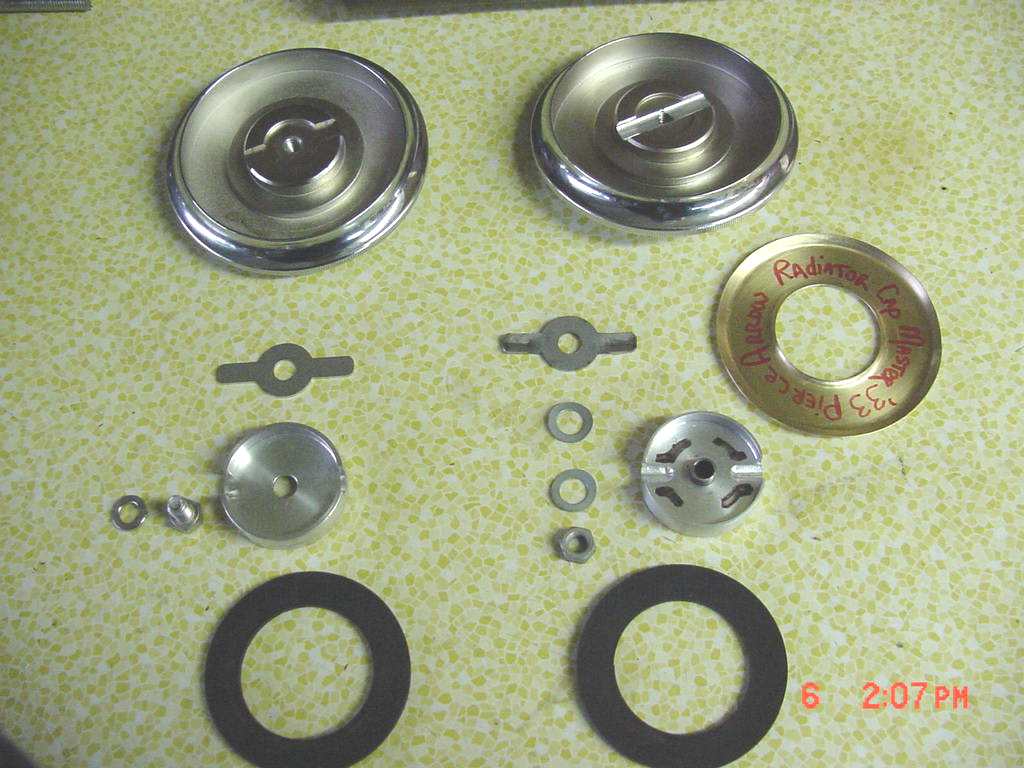
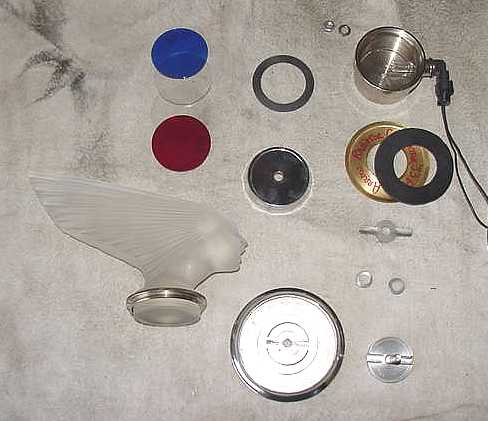
A purchased reproduction cap had the parts shown in the left hand
column. I made additional parts and modified the supplied ones to
create a cap that would actually work. Those part are shown in the
right hand group. Stainless steel hardware was upgraded to improve
longevity, a spacer sleeve controlled clearance between two wave
washers
which allowed the cross arm to "float" improving engagement with
the radiator's filler neck. The cross arm was forged to increase its
arm
strength and a radius profile added to the leading edge for better
engagement. A brass
gasket support ring was fabricated to center and provide appropriate
gasket compression. The centering body was turned down to match a
specific radiator filler neck size. Then the cap tops were center
drilled to allow a threaded mounting stud to protrude above the cap. In
all, about five hours of work per cap, or a bit more.
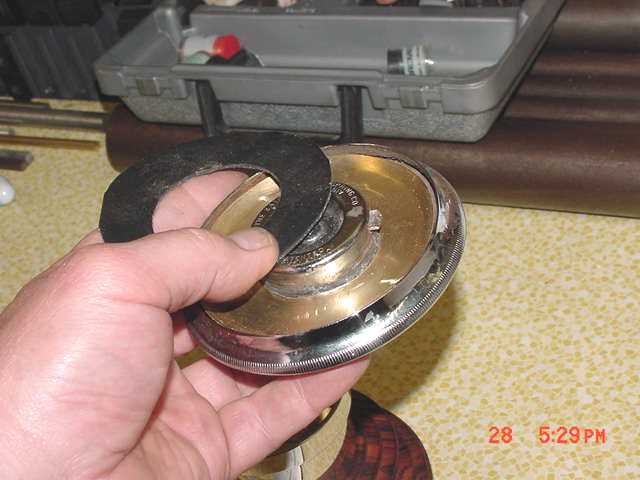
The right hand photo is of an original cap that was rebuilt with my
"extra parts". These had to be hand fit to the center because several
different dimensions for various makes exist. Then work to various
mascots began. This is an old metal cast version of a Lalique art deco
piece titled "Vitesse" a personification of speed.
In this case two small mounting screws were damaged and bent beyond
usefullness so they were removed and a single larger stud was cast into
the statue on her centerline. The statue base was milled flat and an
adapter ring obtained to adapt that flat surface to the radiator cap
crown. A rubber foam gasket was cut to provide sealing and a cushon for
the assembly. The mounted statue was then shipped to the
owner
who indexed it to his radiator filler and installed a
locating
pin I provided so in subsquent use it would remain pointed
forward.

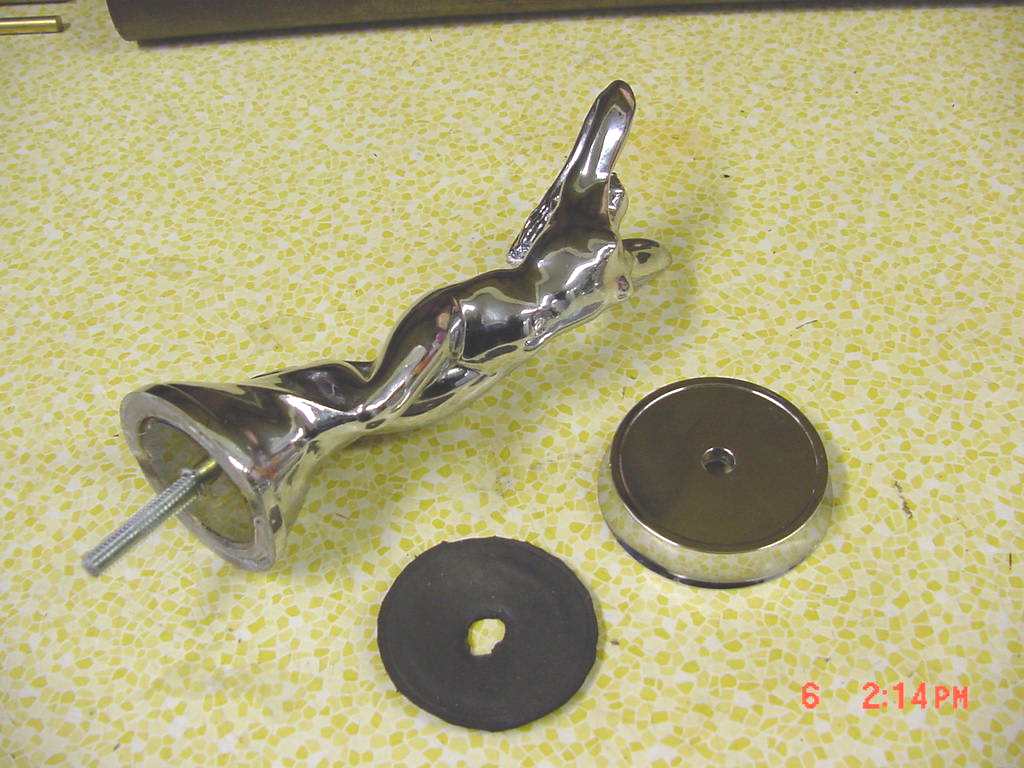
This bowman is an orgional 1933 Pierce Arrow mascot. It had a corroded
mounting stud and minor damage that was corrected before it was mounted
on a cap.
It's base conture was correct to match a radiator cap crown so no
adaptor was installed. It is displayed here resting on a Lalique base
for photographic stability.
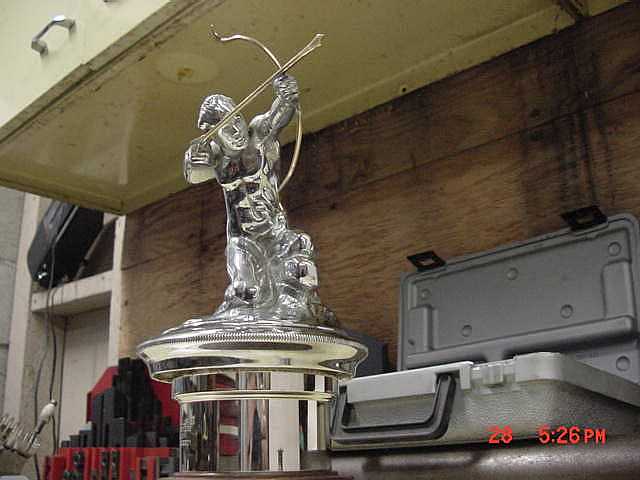
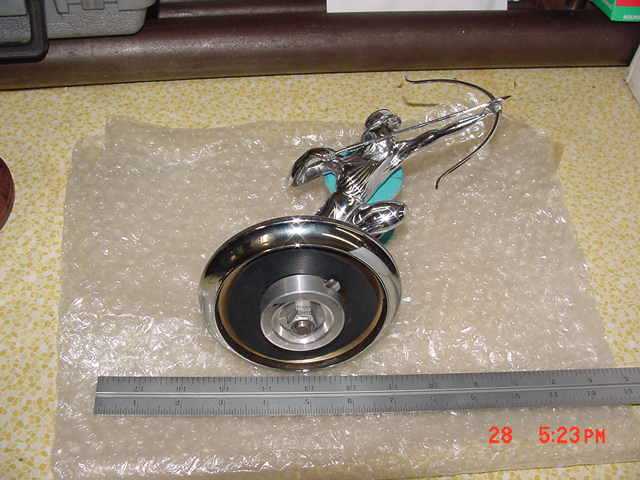
The next hood ornament shown below is a 1929 Pierce Arrow piece. It had
been broken at the bow arm wrist extension and repaired with soldered
potmetal then chromed over. Not very pretty, and the bow was gone. It
needed difficult and risk filled repairs. More importantly any method
to mount a bow was gone too. I removed most of the old repair and
reconstructed part of the finger detail with solder. I was able to
drill a mounting hole for a reproduction bow and arrow in the fist and
install them with clear epoxy. Not a perfect repair but much better
than it was and now quite presentable for a parade or motocade vehicle.

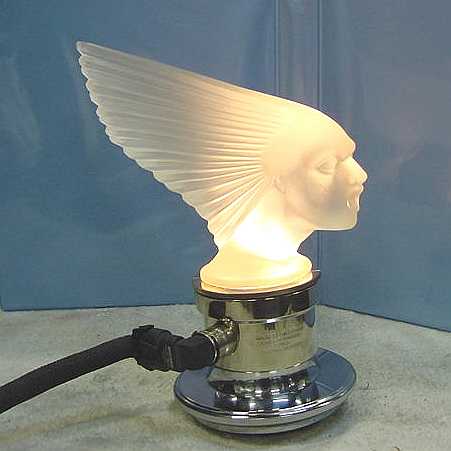
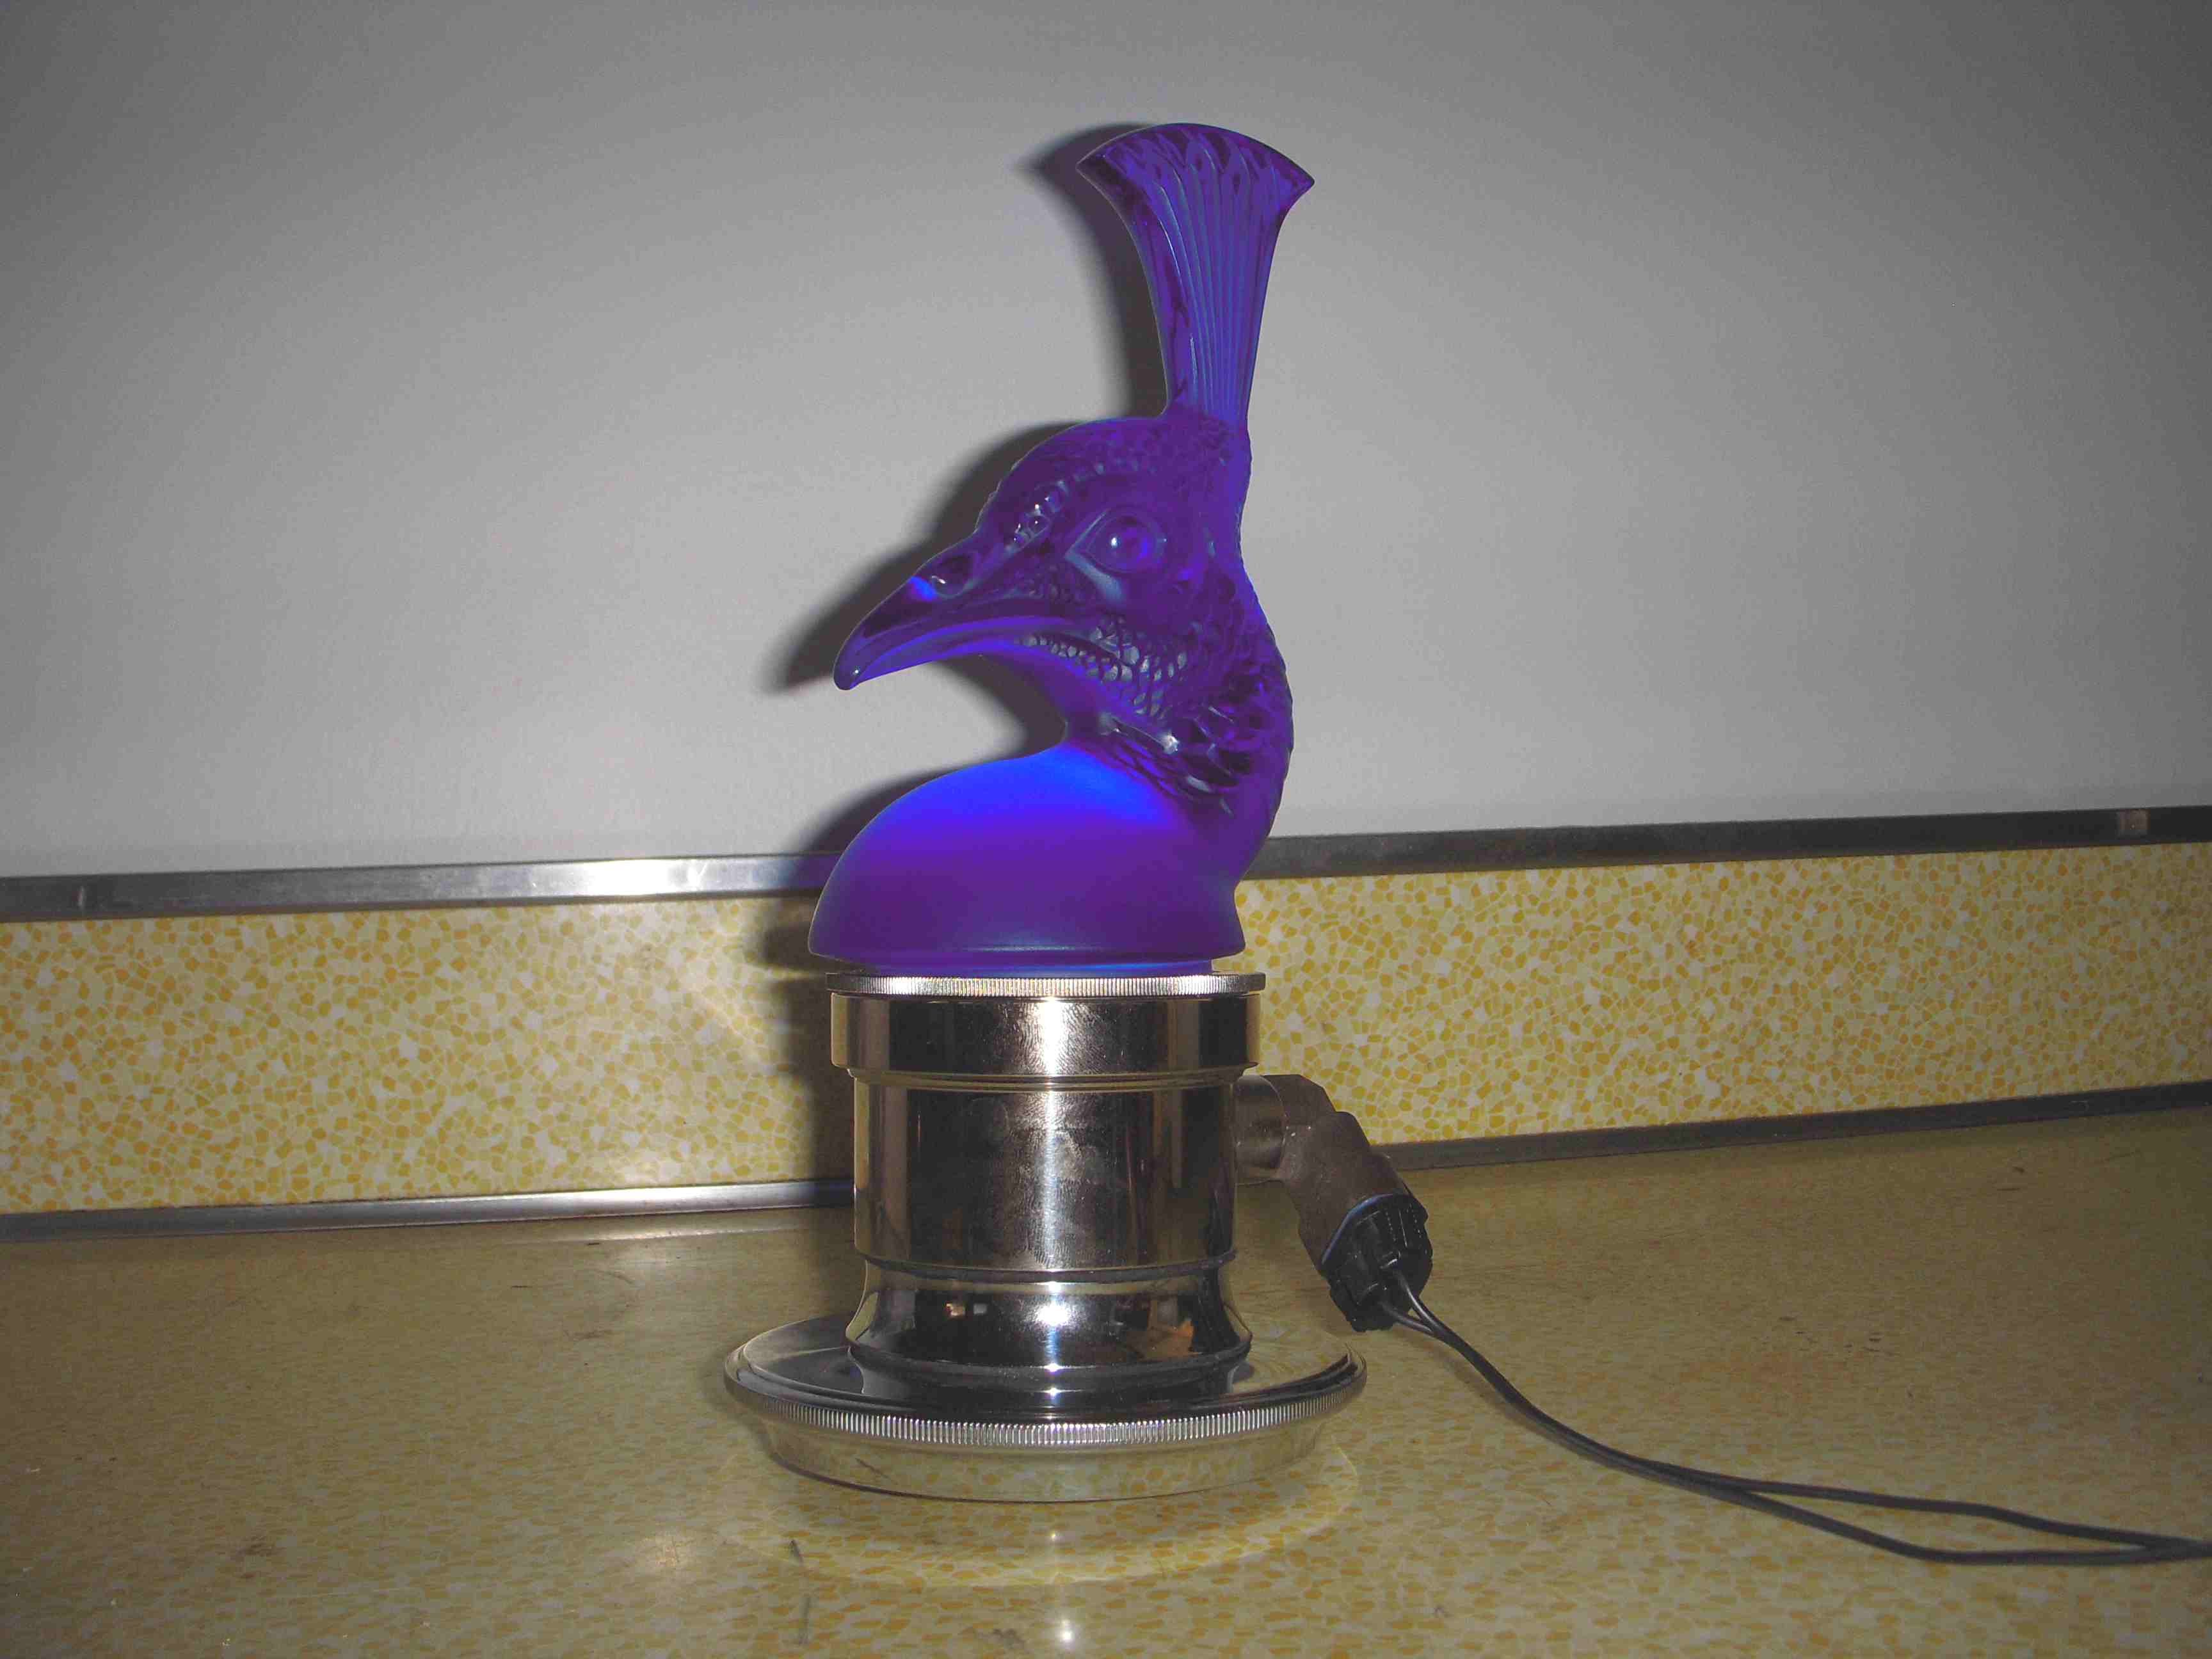
The last two mascots are reproduction Lalique items from 1928
titled "Victoire" and "Peacock Head". They were
provided to
me with original style mounting rings and a museum display
base.
My job was to fabricate illumination hardware and functional radiator
caps so they could be fitted to a vehicle. By making parts similar to
the ones used for the metal mascots both these
tasks were
completed in 2008-9. I believe both of these mascots will he shown at
the Pierce Arrow west coast national meet in 2009.

Back
to Fowler Main page