Military Jeep Restoration
Jeep Restoration.

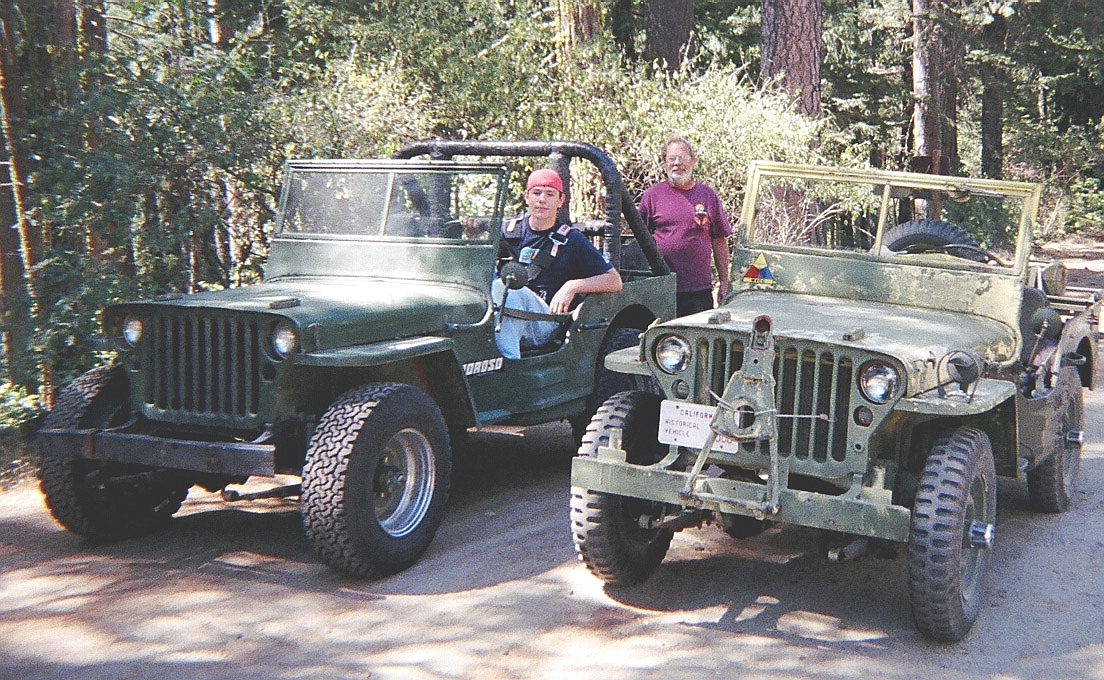
A few years ago my son and I traded into a bunch of WWII jeeps and
partial chassis. We kept the best three. He needed a summer project so
I turned him loose with his buddys to build one jeep from all the
available
parts. That went pretty well and he ended up with this '45 Ford GPW
which we have taken on many trips over the last five years.
I ended up with a '43 Willis MB which wasn't too hard to get
running. (Overhaul of transmission, transfer case, drive shafts, engine
lower end, replacement of more or less everything under the hood,
brakes, fuel system and a bunch of assorted wires, springs, shocks:
"the usual" I was to
later find out.) I started a military oriented repair / restoration
awhile afterwards with a goal of never having my jeep apart too long at
one time. The third jeep, a '45 Ford, was sold to a friend who took it
entirely apart for a "frame off" OEM correct restoration. It has been
apart for a couple of years (in 2005) and is about 3/4 done.
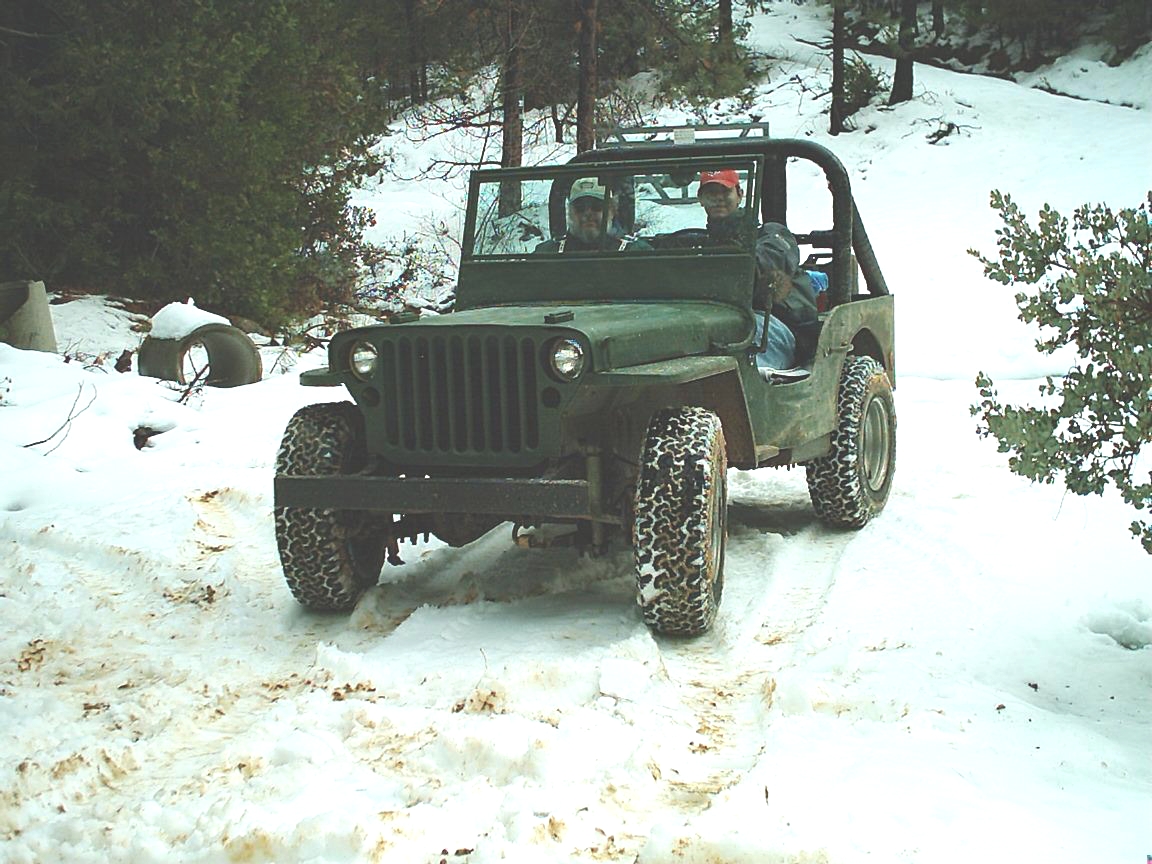
This photo was on a trip to see the start of the
Rubicon trail north of Pollick Pines in California. We've
run both ends of that trail several miles
in but never done the middle (yet).
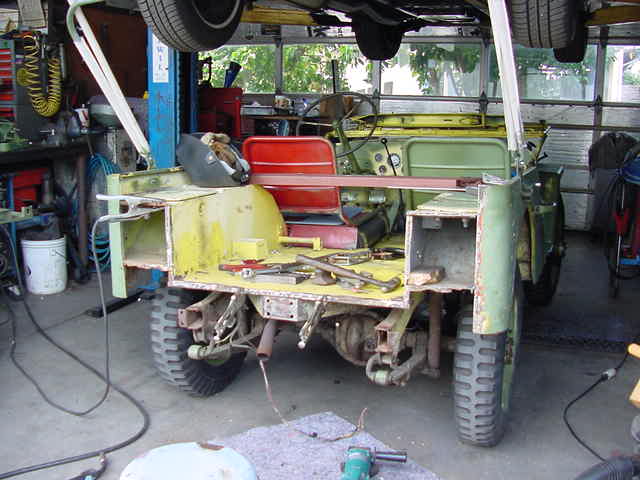
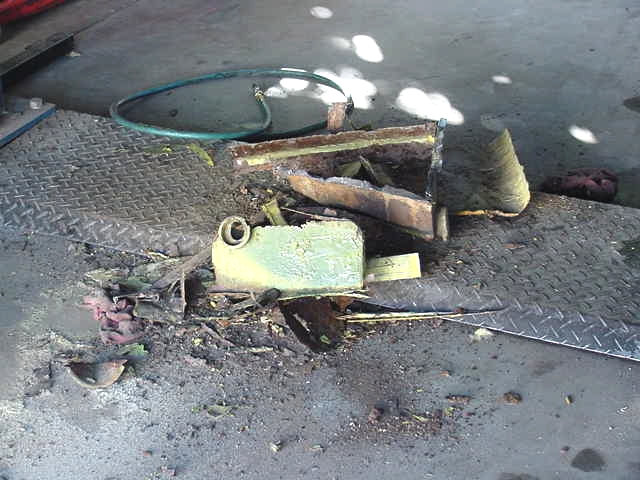
Somebody welded a flat panel without reinforcement or correct features
into the jeeps rear body and made a channel iron bumper over the top of
a ruined rear cross member. It is a common type of repair if your not
concerned about originality. I make NO claim to being a body man or
painter but this seemed so necessary to fix I cut it out and found
the floor was wrinkled up. I usually don't do much restoration work for
myself because I'm busy machining or doing customers cars. However I
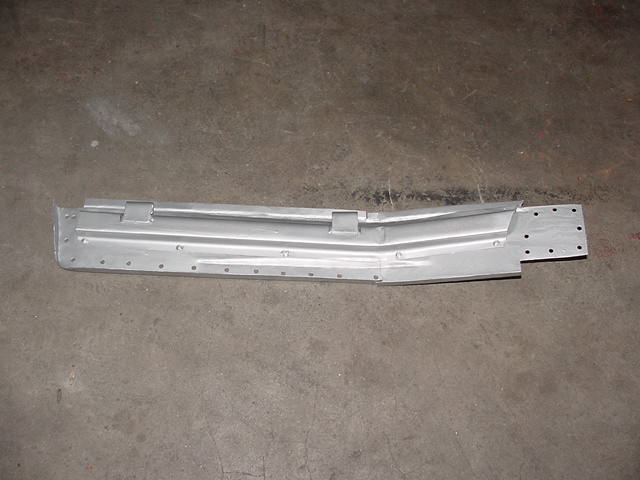
ordered a new OEM style panel and cross member and then found that
everything on the back of the jeep was incorrect or broken in some way
while doing research to fit the panel properly. Stretching the floor
back to semi flat and pressing the tool compartments sort of square
again was a reasonable but "not perfect" repair.
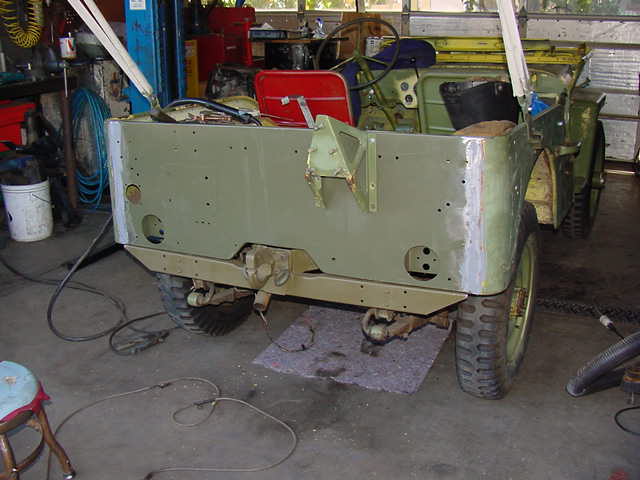
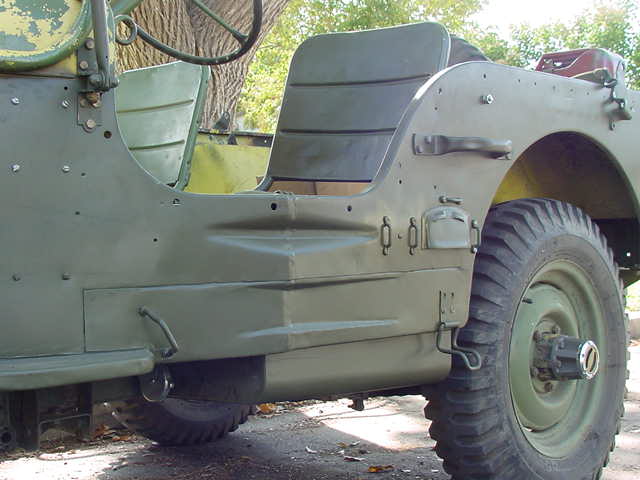
That effort turned out well so I started working my way around the
drivers side. The fuel tank well was rotted out and lower body side
rusted so I cut it out to reach sound metal. The cross member was also
cracked and rotten so a section of that was removed also.

I fabricated new metal to surround a replacement gas tank well and fit
those parts to the opening. Weldable primer and a combination of spot,
MIG, and torch welding enabled a satisfactory attachment to the
original body and allowed a replacement fuel tank to be installed with
it's related seals.
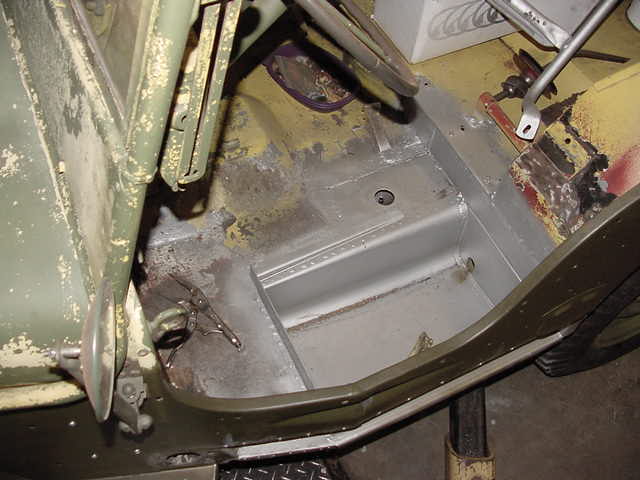
This area started looking better so I replaced the left side foot step
and floor
braces when I welded in the side panel I'd fabricated. Then all the
brackets, holes, and accessories had to be researched, located, and fit.

Because I wanted to use the jeep occasionally after the panels were
structurally finished I painted the area OD Green. Then various
holes were located, then drilled, and accessories were fit. Finish body
work was performed to this area several months after this photo was
taken.
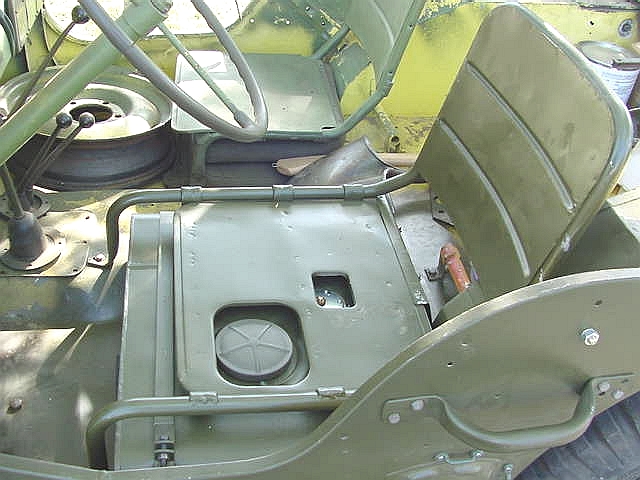
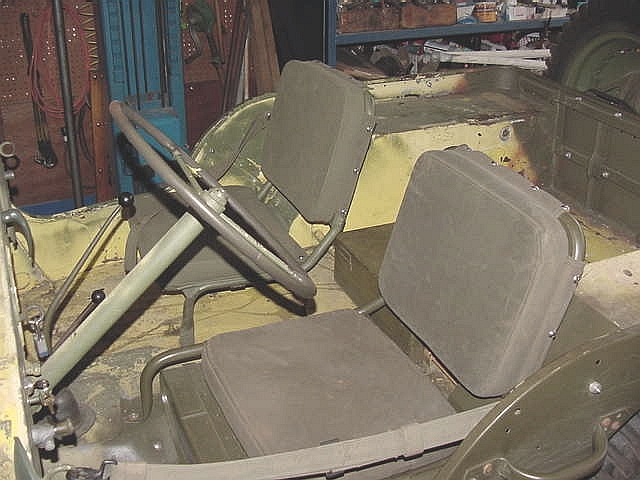
Along the way my seat frames needed attention and several gas
tank
/ seat bottom combinations were trial fit to center the gas filler
correctly. Reproduction parts from several countrys and craftsmen
created fitting tolerance issues that prevented easy removal of the gas
cap. I eventually achieved a slightly better fit than shown here using
a tank from Mike's Military Motors (made by his Australian buddy) and
an
MD Juan bottom on an original frame. It's not perfect, but is nearly as
good as parts available will allow.
 This project was getting interesting and fun because I'd
joined the
Military Vehicles
Collector Club of California (MVCC) with my son and the friend
who was restoring
one of the jeeps we'd sold. We
had also met several parts vendors and many club members who helped us
learn what we were trying to do. Ron's G503 web site is a "must view" area. I've
found there
are many shades of early OD green from various suppliers.
At this stage anything "green" is OK because I determined the
whole tub
will need to be re stripped and properly anti rust
treated before being entirely repainted.
This project was getting interesting and fun because I'd
joined the
Military Vehicles
Collector Club of California (MVCC) with my son and the friend
who was restoring
one of the jeeps we'd sold. We
had also met several parts vendors and many club members who helped us
learn what we were trying to do. Ron's G503 web site is a "must view" area. I've
found there
are many shades of early OD green from various suppliers.
At this stage anything "green" is OK because I determined the
whole tub
will need to be re stripped and properly anti rust
treated before being entirely repainted.

After trial fitting five shovels, three axes, a couple of ax handle
brackets and bending the jeeps side those accessories began to
fit. All the seat cushion holes had to be welded shut and re drilled.


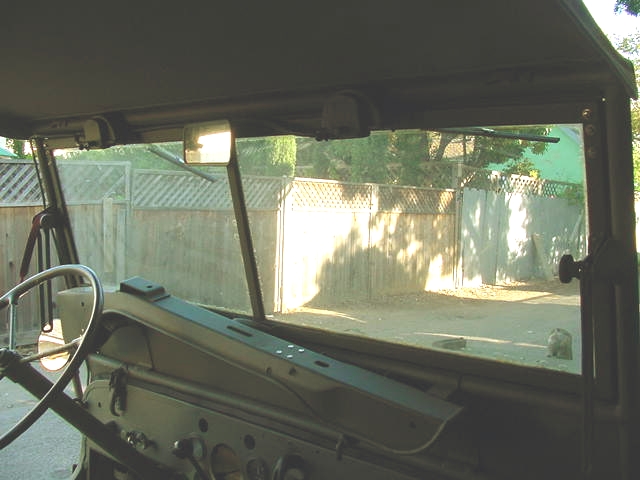
I wanted to do the windshield next, then the hood, to continue
working systematically around the jeep. Each part had problems with
corrosion, extra holes, prior repairs, paint build up, and bending.
These parts were sandblasted first and then all prior repairs were cut
out to be redone. The outer frame tubes were straightened and sleeved
internally. The lower sheet metal panel was crack repaired and had
extensive welding to fill holes created by after market spotlights. The
inner frame was so corroded it required epoxy filler to recast the
glass channel in addition to welding and hardware replacement. The
rifle holder was a week project by itself once correct rivets and
padding were obtained.An electric wiper was discarded and period
correct vacuum wipers were put into place.Once all the sub assemblies
were repaired and painted I installed my old glass in the inner frame
because slight bubbling and age discoloring in the laminate edges
looked very appropriate. The whole windshield fit to the jeep with new
snaps for a OEM style canvas top.
My hood hinge required several new
segments be handmade. Various holes were welded shut and ground smooth
before assembling with new fasteners, stop blocks, and a maintenance
guide holder. These repairs turned out well, on par with other club
restored jeeps. The windshield, hood, and cowl took about a month to
do, plus some time for the wipers and rifle holder.
 One
step along the way with a Jeep restoration is looking for original
"Hood Numbers" or determining them. A place to look is at a hoods
edge when preparing for paint work. I carefully sanded each paint layer
looking to see if something remained of the original marks. In this
case nothing was evident. The layers were (going from metal out) gray
primer, Marine corp blue/green, Forest Service Green, fire truck red,
OD Green, Yellow, OD Green. Dents made it a bit confusing.
One
step along the way with a Jeep restoration is looking for original
"Hood Numbers" or determining them. A place to look is at a hoods
edge when preparing for paint work. I carefully sanded each paint layer
looking to see if something remained of the original marks. In this
case nothing was evident. The layers were (going from metal out) gray
primer, Marine corp blue/green, Forest Service Green, fire truck red,
OD Green, Yellow, OD Green. Dents made it a bit confusing.

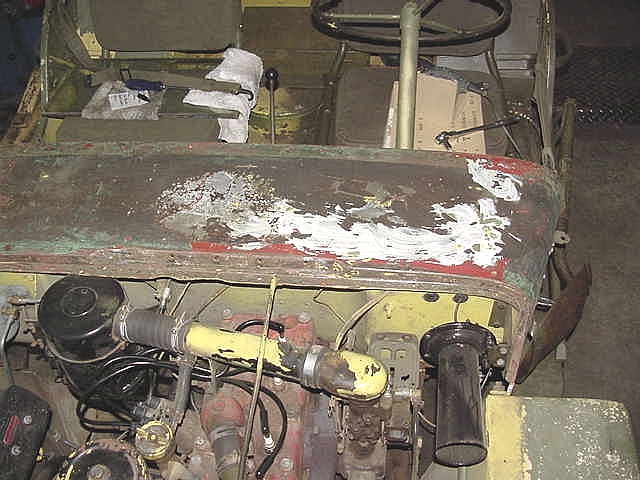
The white paint on the jeeps cowl is a mystery. Has anyone seen this
before? It looked like a sign background located under the red layer?
Most of this work was done prior to 2006. This year front bumper and
tow bar parts have been procured and some original gauges are being
rebuilt for the dash area. It is a turning point because taking the
front sheet metal apart is more than a couple of week job but doing
work to the dash area opens up all sorts of electrical loom issues.
This is a fun project. Jeeps are about as simple a vehicle as ever
built and very well documented. Parts are available at many quality and
price levels and personal preference for various finished
configurations is quite normal. While I strictly repeat, I am not a
body and paint guy, all the work done to this vehicle
represents my personal efforts except stitching canvas components and
overhaul of the vacuum wiper motors.
April 2012. An update is long over due for this story and project.
The three jeeps have each had considerable work completed. Gary, our
family friend who bought the first '45 Ford finished his restoration.
It is nice from front to back and has been shown at several MVCC meets
since completion in 2009. Daryl bought an aluminum "Arctic Top"
for his from the M38 series very similar to the one shown in Fred
Crismon's book "All American Wonder" volume III pages 321 & 323. We
used it off and on for a few years then his interests changed to
motorcycles and his BMW M3 so it was parked until 2011 when he sold it
(less the top) to an East Coast buyer who did a complete restoration.
It turned out to be a match numbers and tub vehicle so was well worth
their efforts to make it like new again. My jeep, the '43 Willis, took
a side step because I became excited about participating in the
transcontential military convoy of 2009 and began planning
modifications which would allow easier travel at higher speeds. I made
some wide "combat rim" wheels for fitting 7.50 tires from a new set of
reproduction rims similar to ones mentioned in various historical
texts. I obtained a T-90 transmission and big shaft transfer case also.
However I broke a valve spring in 2008 so I disassembled part of my
engine for a "quick fix". I found it worn out past the point of an
easy repair so continued to strip it "in frame" for an overhaul. Then I
measured my jeep's block standard bores and upon finding .060 taper and
worn out valve guides paused, thought about many engine parameters I
knew could be improved, then gathered a few blocks and heads to test
changes for increased power before I re-machined mine.
That testing and computer modeling work led me to design and have
fabricated connecting rods and pistons of much more modern design which
are lighter, stronger, more efficient and capable of withstanding at
least 3 times the power levels of a stock engine and twice the RPM.
Then I figured out a "drop in" 11/32 bronze valve guide & big valve
conversion kit from industrial engine turbo charged diesel parts. These
are also far stronger, lighter, and better in all ways than stock
replacement parts. This assured me I could, with better airflow
and block strength dramatically improve power output. I next turned my
attention to cylinder head options and obtained samples of all military
versions of the 134 cid heads and one of a vintage after market "hot
rod" style for analysis. This lead me to some opinions about gaskets
and fit, which I believe will end in having custom head gaskets made
because modern gaskets don't fit original casting very well, and
original gaskets are not made from very good materials. I also did
a lot of air flow testing and found the engine quite well balanced in
its stock form. That means to improve output significantly the intake
air path and carburetion will have to be improved generally. The
exhaust manifold is fine, so far. There are also limitations on
camshaft lift which need to be watched carefully in relation to head
milling for compression ratio increases because air flow drops off if
camshaft lift brings the valves more or less than .035 away from
the head. The next step in this process is to dummy fit and port some
passages to determine if separation of the intake runners is needed.
Then I'll be able to fit all the bits of data together and plan a
logical block and manifold modification process. While this work was
ongoing the transcontential military convoy of 2009 successfully
concluded. I reset my timetable to participate in the Aug 30 2012
MVPA ALCAN Highway Convoy but that looks doubtful
because August is only a few months away at this point.
Back to Fowler
Main page